ICE particle instances provide great speed and control, however you can't deform the instance geometry
of an ICE particle. In this tutorial, we will convert an ICE simulation into a polygon mesh and simulate parts of
this mesh with syflex.
What you need:
The following procedure works with any ICE pointcloud that uses a single mesh as instance geometry.
You can watch the video to get an overview of the technique. Each step is explained further down.
Click below to start the video. View in fullscreen for HD version
1.
To get control over each vertex of the feathers, we will convert the particles to a polymesh.
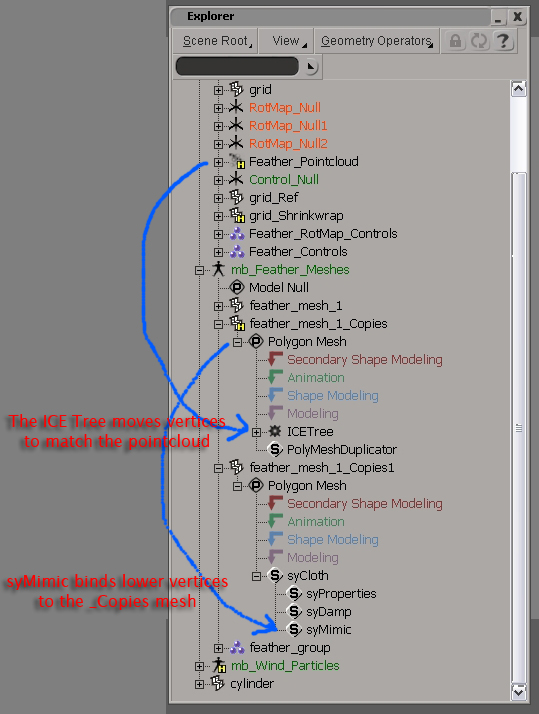
To do this, select the instancing mesh and run the "PolyMesh Duplicator for Pointcloud".
Now when you hit play you will notice that the mesh follows the particles. You can hide the pointcloud now.
2.
Select the "feather_mesh_Copies" mesh and duplicate it. Rename the new mesh to "feather_mesh_cloth" and
hide the "_Copies" mesh.
With the duplicated mesh selected, open an explorer
and freeze the "ICETree" in the stack as we don't need this on the duplicated mesh.
Open the Syflex toolbar and choose "Cloth > Create Cloth", and then "Forces > Add Damp".
3.
If you hit the play button now, you will notice the feathers just stay in place. This is because there is no connection
between the syflex simulation and the ICE dynamics... yet.
The "Mimic" syflex constraint can constrain certain vertices of one mesh to another.
We will create a vertex selection now to tell the syflex simulation what points should follow the original feather movement.
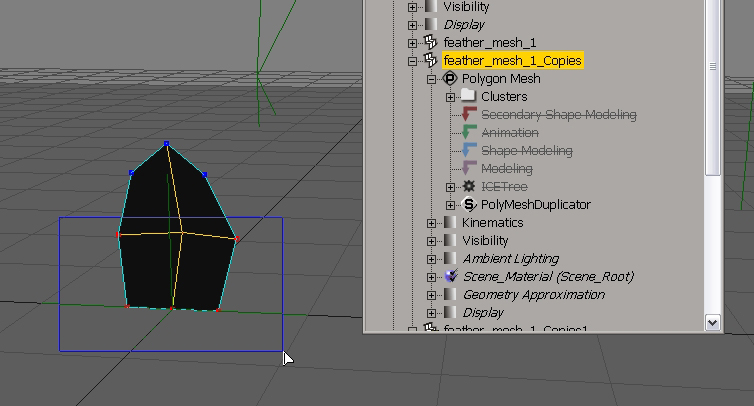
To select the same vertices on every feather duplicate, you can disable the "ICETree" (In the video the selecting is done with a script
but this is the easier way!). Select the lower vertices,
except the 3 at the top - those will get simulated by syflex.

When you enable the ICE Tree again, your selection should look like this:

Save this selection by pressing the "Cluster" button on the right XSI panel (you don't have to do this but I find it convenient when I need the
selection again later.)
4.
This is the important step that establishes the connection between syflex and the ICE simulation.
Right-click on the point cluster we just created and hit 'S' on your keyboard (Select Components).
Hold down CTRL and click on "feather_mesh_Copies" in the explorer.
On the syflex toolbar, choose "Constr > Create Mimic". Now the selected vertices will "mimic" the position of the original mesh.

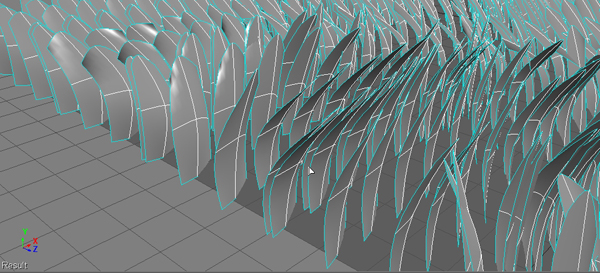
Hit play and watch the feathers wobble around!
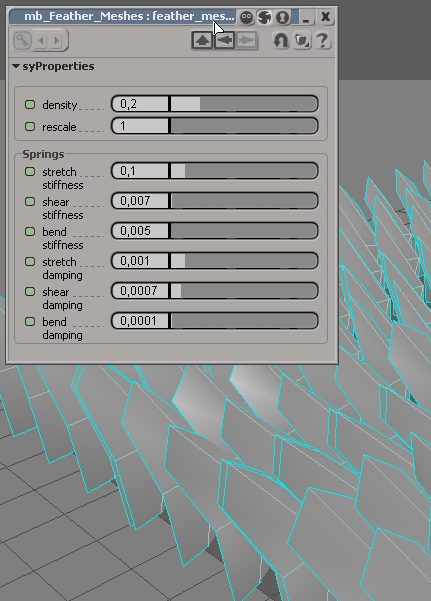
You'll have to tweak the syflex properties to get a good-looking deformation. Decrease the density and increase
the stiffness parameters to get less extreme deformation.
Hit '+' on your numpad to increase the subdivision.


Conclusion:
The syflex mimic constraint can be used to add syflex on top of any mesh deformation. Together with the PolymeshDuplicator addon, it can also be added on top of a live ICE simulation.
More you can do:
In the case above we have used syflex to deform the feather meshes but you could create your own ICE Tree that does something similar and possibly faster, or use any other deform operator.
I hope you enjoyed this little tutorial! Feel free to drop me an email if you have produced something with this technique.
Comment on this tutorial
Go back to mbFeatherTools